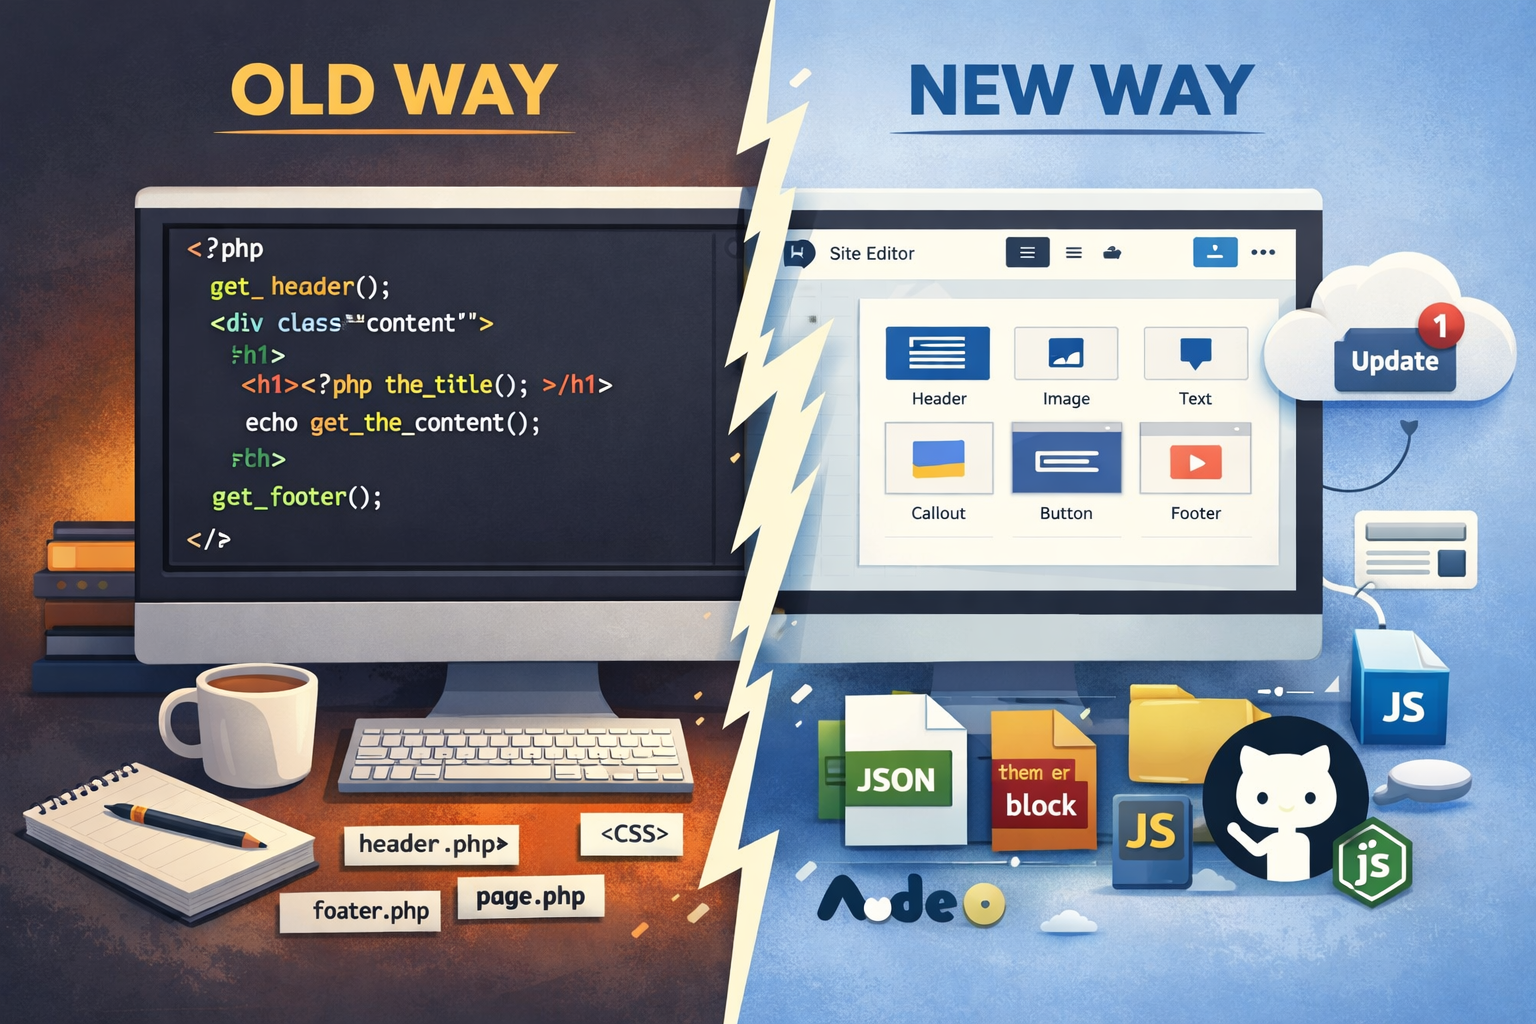
Custom WordPress theme development in 2026 involves two primary approaches: classic PHP-based themes and modern Full Site Editing (FSE) block themes. Classic themes use template files like index.php, while FSE themes rely on block-based layouts and theme.json. Most modern workflows combine FSE, custom Gutenberg blocks, Node-based build systems, and GitHub-powered deployment pipelines.
This guide is a complete, practical walkthrough of both approaches — including real code, build workflows, and production-ready deployment strategies.
Table of Contents
- Development Tools
- Classic Theme Workflow
- Classic Theme Step-by-Step
- FSE Theme Workflow
- FSE Theme Step-by-Step
- Custom Blocks
- Build System
- GitHub Updates
- Final Takeaway
Recommended Development Tools
If you are building custom WordPress themes and blocks professionally, these are the official and trusted resources you should reference. They provide the most accurate, up-to-date information directly from the platforms you are working with.
WordPress Core & Theme Development
- WordPress Theme Developer Handbook
- Template Hierarchy Explained
- wp_head Hook Reference
- register_post_meta()
- wp_update_themes()
Block Editor (Gutenberg) & FSE
- Block Editor Handbook
- Block Theme Overview
- block.json Reference
- Block Attributes Guide
- theme.json Guide
Custom Blocks & Build Tools
GitHub & Deployment Workflows
Modern Development Tools
- LocalWP (Local WordPress Development)
- Visual Studio Code
- Cursor AI Editor
- Windsurf AI
- Claude AI
- OpenAI / Codex
Referencing official documentation like this not only helps you build correctly, but also strengthens your understanding of how WordPress is evolving — especially as Full Site Editing and block-based development continue to expand.
Classic WordPress Theme Workflow
A classic WordPress theme is built around PHP templates and the WordPress template hierarchy. You define how WordPress renders pages by creating files like index.php, single.php, page.php, archive.php, and shared layout files like header.php and footer.php.
This workflow still makes sense when you need tight PHP control, are maintaining older projects, or have server-side rendering requirements that do not map cleanly to block templates.
Classic Theme Directory Structure
/my-theme
style.css        // Theme header + global styles
functions.php    // Theme setup, asset loading, menus, supports
header.php       // Opening HTML, head, branding, navigation
footer.php       // Footer markup, wp_footer(), closing body/html
index.php        // Required fallback template
single.php       // Single post template
page.php         // Static page template
archive.php      // Archive template
search.php       // Search results template
404.php          // Not found template
sidebar.php      // Optional sidebar partial
assets/
  css/           // Additional stylesheets
  js/            // Theme JavaScript
  images/        // Theme images and icons
template-parts/  // Reusable partials for content sections
How to Build a Classic WordPress Theme Step by Step
Step 1: Create the theme folder
Create your theme folder inside wp-content/themes/.
wp-content/themes/my-themeStep 2: Add style.css
WordPress reads the header comment in style.css to recognize the theme in the admin dashboard.
/*
Theme Name: My Theme
Theme URI: https://example.com
Author: Jeremy Anderson
Author URI: https://jeremyanderson.tech
Description: A custom classic WordPress theme.
Version: 1.0.0
Requires at least: 6.6
Tested up to: 6.8
Requires PHP: 8.0
Text Domain: my-theme
*/
You can also add some starter global CSS while getting the theme up and running.
body {
	font-family: Arial, sans-serif;
	line-height: 1.6;
	margin: 0;
	padding: 0;
	color: #111;
	background: #fff;
}

.site-header,
.site-footer {
	padding: 1.5rem;
	background: #f5f5f5;
}

.site-main {
	max-width: 900px;
	margin: 0 auto;
	padding: 2rem 1rem;
}

.site-title a {
	color: inherit;
	text-decoration: none;
}

.primary-menu {
	list-style: none;
	display: flex;
	gap: 1rem;
	padding: 0;
	margin: 1rem 0 0;
}
Step 3: Add functions.php
This is where you register theme supports, menus, and load styles or scripts.
<?php
if ( ! defined( 'ABSPATH' ) ) {
	exit;
}

function my_theme_setup() {
	add_theme_support( 'title-tag' );
	add_theme_support( 'post-thumbnails' );
	add_theme_support(
		'html5',
		array(
			'search-form',
			'comment-form',
			'comment-list',
			'gallery',
			'caption',
			'style',
			'script',
		)
	);

	register_nav_menus(
		array(
			'primary' => __( 'Primary Menu', 'my-theme' ),
		)
	);
}
add_action( 'after_setup_theme', 'my_theme_setup' );

function my_theme_enqueue_assets() {
	wp_enqueue_style(
		'my-theme-style',
		get_stylesheet_uri(),
		array(),
		wp_get_theme()->get( 'Version' )
	);

	wp_enqueue_script(
		'my-theme-main',
		get_template_directory_uri() . '/assets/js/main.js',
		array(),
		wp_get_theme()->get( 'Version' ),
		true
	);
}
add_action( 'wp_enqueue_scripts', 'my_theme_enqueue_assets' );
Step 4: Build header.php
The header file usually contains the document structure, branding, and navigation.
<!DOCTYPE html>
<html <?php language_attributes(); ?>>
<head>
	<meta charset="<?php bloginfo( 'charset' ); ?>">
	<meta name="viewport" content="width=device-width, initial-scale=1">
	<?php wp_head(); ?>
</head>
<body <?php body_class(); ?>>
<?php wp_body_open(); ?>

<header class="site-header">
	<div class="site-branding">
		<h1 class="site-title">
			<a href="<?php echo esc_url( home_url( '/' ) ); ?>">
				<?php bloginfo( 'name' ); ?>
			</a>
		</h1>

		<?php if ( get_bloginfo( 'description' ) ) : ?>
			<p class="site-description"><?php bloginfo( 'description' ); ?></p>
		<?php endif; ?>
	</div>

	<nav class="site-navigation" aria-label="Primary Navigation">
		<?php
		wp_nav_menu(
			array(
				'theme_location' => 'primary',
				'container'      => false,
				'menu_class'     => 'primary-menu',
				'fallback_cb'    => false,
			)
		);
		?>
	</nav>
</header>
Step 5: Build footer.php
<footer class="site-footer">
<p>© <?php echo esc_html( date( 'Y' ) ); ?> <?php bloginfo( 'name' ); ?></p>
</footer>
<?php wp_footer(); ?>
</body>
</html>Step 6: Build index.php
index.php is the required fallback template. If WordPress does not find a more specific template, it lands here.
<?php get_header(); ?>

<main class="site-main">
	<?php if ( have_posts() ) : ?>
		<?php while ( have_posts() ) : the_post(); ?>
			<article id="post-<?php the_ID(); ?>" <?php post_class(); ?>>
				<h2 class="entry-title">
					<a href="<?php the_permalink(); ?>"><?php the_title(); ?></a>
				</h2>

				<div class="entry-content">
					<?php the_excerpt(); ?>
				</div>
			</article>
		<?php endwhile; ?>

		<div class="pagination">
			<?php the_posts_pagination(); ?>
		</div>
	<?php else : ?>
		<p>No posts found.</p>
	<?php endif; ?>
</main>

<?php get_footer(); ?>
Step 7: Build single.php
This template controls how individual blog posts render.
<?php get_header(); ?>

<main class="site-main">
	<?php if ( have_posts() ) : ?>
		<?php while ( have_posts() ) : the_post(); ?>
			<article id="post-<?php the_ID(); ?>" <?php post_class(); ?>>
				<h1 class="entry-title"><?php the_title(); ?></h1>

				<div class="entry-meta">
					<span>Published on <?php echo esc_html( get_the_date() ); ?></span>
				</div>

				<?php if ( has_post_thumbnail() ) : ?>
					<div class="entry-thumbnail">
						<?php the_post_thumbnail( 'large' ); ?>
					</div>
				<?php endif; ?>

				<div class="entry-content">
					<?php the_content(); ?>
				</div>
			</article>
		<?php endwhile; ?>
	<?php endif; ?>
</main>

<?php get_footer(); ?>
Step 8: Build page.php
This handles normal WordPress pages.
<?php get_header(); ?>

<main class="site-main">
	<?php if ( have_posts() ) : ?>
		<?php while ( have_posts() ) : the_post(); ?>
			<article id="page-<?php the_ID(); ?>" <?php post_class(); ?>>
				<h1 class="entry-title"><?php the_title(); ?></h1>
				<div class="entry-content">
					<?php the_content(); ?>
				</div>
			</article>
		<?php endwhile; ?>
	<?php endif; ?>
</main>

<?php get_footer(); ?>
Step 9: Build archive.php
This renders category, tag, author, and date archives unless a more specific archive template exists.
<?php get_header(); ?>

<main class="site-main">
	<header class="archive-header">
		<h1 class="archive-title"><?php the_archive_title(); ?></h1>
		<div class="archive-description"><?php the_archive_description(); ?></div>
	</header>

	<?php if ( have_posts() ) : ?>
		<?php while ( have_posts() ) : the_post(); ?>
			<article id="post-<?php the_ID(); ?>" <?php post_class(); ?>>
				<h2><a href="<?php the_permalink(); ?>"><?php the_title(); ?></a></h2>
				<?php the_excerpt(); ?>
			</article>
		<?php endwhile; ?>

		<?php the_posts_pagination(); ?>
	<?php else : ?>
		<p>No archive content found.</p>
	<?php endif; ?>
</main>

<?php get_footer(); ?>
At this point, you have a working classic theme foundation. From there, you can add widget areas, custom templates, reusable template-parts, or custom post type support.
Full Site Editing (FSE) Block Theme Workflow
A block theme replaces most of the PHP template layer with block-based HTML templates, reusable template parts, and a central theme.json file. Instead of hardcoding layout decisions directly in PHP, you define a system that WordPress can render and editors can work with more flexibly.
This approach is better aligned with how modern WordPress is evolving. It supports reusable design systems, cleaner global styling, and a stronger editor experience for content teams.
Block Theme Directory Structure
/my-block-theme
style.css         // Required theme header so WordPress recognizes the theme
theme.json        // Global settings, styles, typography, colors, spacing, layout
functions.php     // Theme setup, editor styles, optional block registration
templates/
  index.html      // Required fallback block template
  single.html     // Single post template
  page.html       // Static page template
  archive.html    // Archive template
  home.html       // Blog posts index template (optional but common)
parts/
  header.html     // Reusable header template part
  footer.html     // Reusable footer template part
patterns/         // Optional block patterns for reusable layouts
assets/
  css/            // Optional extra stylesheets
  js/             // Optional JavaScript
  images/         // Theme images and graphics
How to Build a Block Theme Step by Step
Step 1: Create the theme folder
Create the theme inside wp-content/themes/.
wp-content/themes/my-block-themeStep 2: Add style.css
Even though block themes rely heavily on theme.json and block templates, WordPress still needs a valid theme header in style.css.
/*
Theme Name: My Block Theme
Theme URI: https://example.com
Author: Jeremy Anderson
Author URI: https://jeremyanderson.tech
Description: A custom Full Site Editing block theme.
Version: 1.0.0
Requires at least: 6.6
Tested up to: 6.8
Requires PHP: 8.0
Text Domain: my-block-theme
*/
You can keep style.css minimal if most of your global styling is handled in theme.json. In many modern themes, that is exactly what happens.
Step 3: Add theme.json
This file is one of the biggest differences between a classic theme and a block theme. It centralizes settings like colors, typography, spacing, layout widths, and even block-specific styling rules.
{
  "$schema": "https://schemas.wp.org/trunk/theme.json",
  "version": 3,
  "settings": {
    "appearanceTools": true,
    "layout": {
      "contentSize": "760px",
      "wideSize": "1200px"
    },
    "color": {
      "defaultPalette": false,
      "palette": [
        {
          "slug": "background",
          "name": "Background",
          "color": "#ffffff"
        },
        {
          "slug": "foreground",
          "name": "Foreground",
          "color": "#111827"
        },
        {
          "slug": "primary",
          "name": "Primary",
          "color": "#2563eb"
        },
        {
          "slug": "muted",
          "name": "Muted",
          "color": "#f3f4f6"
        }
      ]
    },
    "typography": {
      "fluid": true,
      "fontFamilies": [
        {
          "fontFamily": "-apple-system, BlinkMacSystemFont, 'Segoe UI', sans-serif",
          "slug": "system-sans",
          "name": "System Sans"
        },
        {
          "fontFamily": "Georgia, serif",
          "slug": "serif",
          "name": "Serif"
        }
      ],
      "fontSizes": [
        {
          "slug": "small",
          "size": "0.875rem",
          "name": "Small"
        },
        {
          "slug": "medium",
          "size": "1rem",
          "name": "Medium"
        },
        {
          "slug": "large",
          "size": "1.5rem",
          "name": "Large"
        },
        {
          "slug": "x-large",
          "size": "2.25rem",
          "name": "Extra Large"
        }
      ]
    },
    "spacing": {
      "units": [ "px", "rem", "%", "vw", "vh" ]
    }
  },
  "styles": {
    "color": {
      "background": "var(--wp--preset--color--background)",
      "text": "var(--wp--preset--color--foreground)"
    },
    "typography": {
      "fontFamily": "var(--wp--preset--font-family--system-sans)",
      "lineHeight": "1.6"
    },
    "elements": {
      "heading": {
        "typography": {
          "fontWeight": "700",
          "lineHeight": "1.2"
        }
      },
      "link": {
        "color": {
          "text": "var(--wp--preset--color--primary)"
        }
      }
    }
  }
}
This gives you centralized control over design tokens and default styling across the entire theme.
Step 4: Create the templates and parts folders
These folders are where the block template system lives.
/my-block-theme
style.css
theme.json
templates/
parts/
templates contains the main layouts. parts contains reusable fragments like the header and footer.
Step 5: Build parts/header.html
Template parts use raw Gutenberg block markup stored in HTML files.
<!-- wp:group {"align":"full","style":{"spacing":{"padding":{"top":"1rem","bottom":"1rem","left":"1rem","right":"1rem"}}},"backgroundColor":"muted","layout":{"type":"constrained"}} -->
<div class="wp-block-group alignfull has-muted-background-color has-background">
	<!-- wp:group {"layout":{"type":"flex","justifyContent":"space-between","verticalAlignment":"center"}} -->
	<div class="wp-block-group">
		<!-- wp:site-title {"level":0} /-->
		<!-- wp:navigation {"layout":{"type":"flex","justifyContent":"right"}} /-->
	</div>
	<!-- /wp:group -->
</div>
<!-- /wp:group -->
This gives you a reusable site header using core blocks instead of PHP markup.
Step 6: Build parts/footer.html
<!-- wp:group {"align":"full","style":{"spacing":{"padding":{"top":"2rem","bottom":"2rem","left":"1rem","right":"1rem"}}},"backgroundColor":"muted","layout":{"type":"constrained"}} -->
<div class="wp-block-group alignfull has-muted-background-color has-background">
	<!-- wp:paragraph {"align":"center"} -->
	<p class="has-text-align-center">© 2026 My Block Theme</p>
	<!-- /wp:paragraph -->
</div>
<!-- /wp:group -->
Step 7: Build templates/index.html
This is the fallback template for the theme, similar to index.php in a classic theme.
<!-- wp:template-part {"slug":"header","tagName":"header"} /-->

<!-- wp:group {"tagName":"main","layout":{"type":"constrained"}} -->
<main class="wp-block-group">
	<!-- wp:query {"query":{"perPage":10,"pages":0,"offset":0,"postType":"post","order":"desc","orderBy":"date","inherit":true}} -->
	<div class="wp-block-query">
		<!-- wp:post-template -->
			<!-- wp:group {"style":{"spacing":{"blockGap":"1rem"}},"layout":{"type":"constrained"}} -->
			<div class="wp-block-group">
				<!-- wp:post-title {"isLink":true} /-->
				<!-- wp:post-excerpt /-->
			</div>
			<!-- /wp:group -->
		<!-- /wp:post-template -->

		<!-- wp:query-pagination -->
			<!-- wp:query-pagination-previous /-->
			<!-- wp:query-pagination-numbers /-->
			<!-- wp:query-pagination-next /-->
		<!-- /wp:query-pagination -->
	</div>
	<!-- /wp:query -->
</main>
<!-- /wp:group -->

<!-- wp:template-part {"slug":"footer","tagName":"footer"} /-->
Step 8: Build templates/single.html
This controls the layout of an individual blog post.
<!-- wp:template-part {"slug":"header","tagName":"header"} /-->

<!-- wp:group {"tagName":"main","layout":{"type":"constrained"}} -->
<main class="wp-block-group">
	<!-- wp:post-title {"level":1} /-->
	<!-- wp:post-featured-image {"isLink":false,"align":"wide"} /-->
	<!-- wp:post-content /-->
</main>
<!-- /wp:group -->

<!-- wp:template-part {"slug":"footer","tagName":"footer"} /-->
Step 9: Build templates/page.html
This handles standard WordPress pages.
<!-- wp:template-part {"slug":"header","tagName":"header"} /-->

<!-- wp:group {"tagName":"main","layout":{"type":"constrained"}} -->
<main class="wp-block-group">
	<!-- wp:post-title {"level":1} /-->
	<!-- wp:post-content /-->
</main>
<!-- /wp:group -->

<!-- wp:template-part {"slug":"footer","tagName":"footer"} /-->
Step 10: Build templates/archive.html
This controls archive pages such as categories and tags unless a more specific archive template exists.
<!-- wp:template-part {"slug":"header","tagName":"header"} /-->

<!-- wp:group {"tagName":"main","layout":{"type":"constrained"}} -->
<main class="wp-block-group">
	<!-- wp:query-title {"type":"archive","showPrefix":true} /-->
	<!-- wp:term-description /-->

	<!-- wp:query {"query":{"inherit":true}} -->
	<div class="wp-block-query">
		<!-- wp:post-template -->
			<!-- wp:post-title {"isLink":true} /-->
			<!-- wp:post-excerpt /-->
		<!-- /wp:post-template -->

		<!-- wp:query-pagination -->
			<!-- wp:query-pagination-previous /-->
			<!-- wp:query-pagination-numbers /-->
			<!-- wp:query-pagination-next /-->
		<!-- /wp:query-pagination -->
	</div>
	<!-- /wp:query -->
</main>
<!-- /wp:group -->

<!-- wp:template-part {"slug":"footer","tagName":"footer"} /-->
Step 11: Add functions.php if needed
A very simple block theme can work with almost no PHP, but functions.php is still useful for editor styles, setup, helper logic, or block registration.
<?php
if ( ! defined( 'ABSPATH' ) ) {
	exit;
}

function my_block_theme_setup() {
	add_editor_style( 'assets/css/editor.css' );
}
add_action( 'after_setup_theme', 'my_block_theme_setup' );
That keeps the theme lightweight while still letting you extend it when needed.
What block themes do especially well
- Global design control through
theme.json - Reusable layout systems through templates and parts
- Better editor alignment with front-end structure
- Cleaner control over spacing, typography, and colors
- A more future-facing WordPress workflow
At this point, you have a real block theme foundation. From here, the next major layer is custom blocks, build tooling, and a release workflow — which is where the system becomes truly scalable.
Creating Custom Gutenberg Blocks
Once you move beyond basic theme structure, custom blocks are where modern WordPress development becomes much more powerful. A block theme handles layout and global design rules, but custom blocks let you control how structured content is created, edited, and reused.
Instead of relying on editors to manually assemble the same kind of content over and over, you can build purpose-driven components like callouts, team cards, FAQs, research highlights, pricing grids, CTA sections, and data-driven listings.
Why custom blocks matter
- They improve consistency across posts and pages.
- They reduce editor error.
- They make structured content easier to scale.
- They give developers tighter control over output markup.
- They support stronger SEO, AEO, and GEO by making content more predictable.
If you are building a modern WordPress system instead of a one-off brochure site, custom blocks are usually where the real leverage starts.
Custom Block Project Structure
/blocks
  callout/
    block.json        // Block metadata and asset references
    src/
      index.js        // Main registration entry
      edit.js         // Editor UI component
      save.js         // Front-end saved markup for static blocks
      editor.scss     // Editor-only styles
      style.scss      // Front-end styles
    build/
      index.js        // Compiled JavaScript bundle
      index.asset.php // WordPress dependency + version file
      index.css       // Compiled editor CSS
      style-index.css // Compiled front-end CSS
This structure is common because it separates editable source files from compiled production assets.
Step 1: Scaffold a block
The fastest way to start is with the official WordPress scaffolding tool:
npx @wordpress/create-block@latest my-callout-block
cd my-callout-block
This creates a plugin-based block starter with build tooling already configured. That is the normal starting point because blocks are typically registered by plugins and then used inside whatever theme you are building.
Step 2: Configure block.json
The block.json file defines the block’s name, icon, category, supported features, attributes, and connected assets.
{
  "$schema": "https://schemas.wp.org/trunk/block.json",
  "apiVersion": 3,
  "name": "mytheme/callout",
  "title": "Callout",
  "category": "design",
  "icon": "megaphone",
  "description": "A custom callout block with editable headline and body text.",
  "textdomain": "mytheme",
  "attributes": {
    "headline": {
      "type": "string",
      "default": "Build WordPress the modern way"
    },
    "body": {
      "type": "string",
      "default": "Use block themes, custom blocks, and a real release workflow."
    }
  },
  "supports": {
    "html": false,
    "spacing": {
      "padding": true,
      "margin": true
    },
    "color": {
      "background": true,
      "text": true
    }
  },
  "editorScript": "file:./build/index.js",
  "editorStyle": "file:./build/index.css",
  "style": "file:./build/style-index.css"
}
This metadata-driven approach is cleaner than manually registering every asset in PHP.
Step 3: Create the editor component in edit.js
The editor component defines what the user interacts with inside Gutenberg.
import { RichText, useBlockProps } from '@wordpress/block-editor';

export default function Edit( { attributes, setAttributes } ) {
	const { headline, body } = attributes;

	return (
		<div { ...useBlockProps( { className: 'my-callout-block' } ) }>
			<RichText
				tagName="h2"
				value={ headline }
				onChange={ ( value ) => setAttributes( { headline: value } ) }
				placeholder="Add headline..."
			/>
			<RichText
				tagName="p"
				value={ body }
				onChange={ ( value ) => setAttributes( { body: value } ) }
				placeholder="Add body text..."
			/>
		</div>
	);
}
This is one of the biggest conceptual shifts from classic theming. You are not just rendering markup. You are building the editing interface itself.
Step 4: Define saved markup in save.js
For a static block, the save function determines what gets stored in post content and rendered on the front end.
import { RichText, useBlockProps } from '@wordpress/block-editor';

export default function save( { attributes } ) {
	const { headline, body } = attributes;

	return (
		<div { ...useBlockProps.save( { className: 'my-callout-block' } ) }>
			<RichText.Content tagName="h2" value={ headline } />
			<RichText.Content tagName="p" value={ body } />
		</div>
	);
}
If the block needs to stay in sync with live data, you would use a dynamic block instead and render it in PHP.
Step 5: Add styles
You usually want separate styles for the editor and the front end.
/* editor.scss */
.my-callout-block {
	border: 1px dashed #94a3b8;
	padding: 1rem;
	border-radius: 0.5rem;
}

/* style.scss */
.my-callout-block {
	padding: 1.25rem;
	border-radius: 0.75rem;
	background: #eff6ff;
}

.my-callout-block h2 {
	margin-top: 0;
	margin-bottom: 0.5rem;
}

.my-callout-block p {
	margin: 0;
}
Step 6: Register the block in PHP when needed
If you are registering a metadata-based block from your theme or a custom plugin, this is the standard pattern:
function mytheme_register_blocks() {
	register_block_type( __DIR__ . '/blocks/callout' );
}
add_action( 'init', 'mytheme_register_blocks' );
That tells WordPress to read the block folder, parse block.json, and load the correct assets automatically.
When to use a dynamic block
A static block stores its rendered markup directly in the post content. A dynamic block renders on the server every time the page loads.
- Use a static block for structured content like callouts, CTAs, or comparison sections.
- Use a dynamic block for content that should always stay up to date, such as latest posts, directory listings, event feeds, or publication queries.
Dynamic blocks are especially useful when the displayed content depends on database queries or external data sources.
Node Build System, src vs build, and Why It Matters
Once you start creating custom blocks, you are no longer just writing plain PHP and CSS. You are usually working with modern JavaScript, JSX, SCSS, metadata-driven assets, and a build process that compiles everything into the files WordPress can actually load.
That is why modern WordPress development typically includes Node.js. It is not there just to add complexity. It solves a practical problem: it lets you write maintainable source code and transform it into production-ready assets.
What src and build mean
/src
  index.js        // Registration entry
  edit.js         // Editor UI
  save.js         // Saved front-end markup
  editor.scss     // Editor-only styles
  style.scss      // Front-end styles

/build
  index.js        // Compiled JavaScript
  index.asset.php // WordPress dependency/version metadata
  index.css       // Compiled editor CSS
  style-index.css // Compiled front-end CSS
The rule is simple:
- Edit files in
src. - Ship files from
build. - Do not hand-edit compiled files unless you have a very specific reason.
Typical package.json setup
A minimal block build setup often looks like this:
{
  "name": "my-block-theme",
  "version": "1.0.0",
  "private": true,
  "scripts": {
    "start": "wp-scripts start",
    "build": "wp-scripts build"
  },
  "devDependencies": {
    "@wordpress/scripts": "^30.0.0"
  }
}
Then install dependencies and start the build process:
npm install
npm run start
npm run build
npm run start watches for changes during development. npm run build generates production-ready assets.
Why this matters in real projects
- It keeps your source code cleaner.
- It makes custom blocks easier to scale.
- It gives you a repeatable process for production builds.
- It fits naturally with Git versioning and release workflows.
Project Structure and .gitignore
A modern WordPress project benefits from a clean, intentional structure. This becomes even more important when you are working with FSE themes, custom blocks, and a build pipeline.
Example project structure
/my-block-theme
style.css            // Theme header and optional base CSS
theme.json           // Global settings, styles, layout rules
functions.php        // Theme setup and optional helpers
package.json         // Node scripts and dev dependencies
package-lock.json    // Locked dependency versions
.gitignore           // Files Git should ignore
templates/           // Block-based theme templates
parts/               // Reusable template parts
patterns/            // Optional reusable block patterns
assets/              // Images, CSS, JS, etc.
blocks/
  callout/
    block.json       // Block metadata
    src/             // Editable source files
    build/           // Compiled production files
  faq/
    block.json
    src/
    build/
Suggested .gitignore
node_modules/
.DS_Store
Thumbs.db
npm-debug.log*
yarn-debug.log*
yarn-error.log*
.vscode/
.idea/
.env
.env.local
*.zip
This keeps dependency folders, local editor settings, logs, and environment secrets out of Git.
Should you commit the build folder?
For many WordPress projects, yes. If the production environment is not running Node, the compiled files need to be available in the repository or release package. A very common real-world workflow is:
- Ignore
node_modules - Commit
package.jsonand lock files - Commit the compiled
buildoutput - Do not commit local environment clutter
That gives you a deliverable project WordPress can actually run without requiring a server-side build step.
The real advantage of this workflow
Once you put these pieces together, your WordPress project stops being a loose collection of theme files and starts behaving like a real software project. That matters if you want maintainability, cleaner deployments, better collaboration, and more confidence in updates.
How to Make GitHub Releases Show Up in the WordPress Theme Updates UI
Yes, you can make a GitHub-hosted custom theme show update notices in the native WordPress admin without relying on a third-party updater plugin. WordPress supports this through the Update URI theme header and the dynamic update_themes_{hostname} filter for third-party theme updates. :contentReference[oaicite:0]{index=0}
For a GitHub-based workflow, the cleanest pattern is to publish versioned GitHub releases, attach a ZIP file for the built theme, and have your theme query the latest release metadata from GitHub’s Releases API. GitHub exposes release metadata, attached assets, and downloadable URLs such as browser_download_url and zipball_url. :contentReference[oaicite:1]{index=1}
Step 1: Add Update URI to style.css
The Update URI tells WordPress that your theme is managed outside WordPress.org and helps prevent it from being overwritten by a WordPress.org theme with the same slug. WordPress 6.1 introduced this header specifically for third-party themes. :contentReference[oaicite:2]{index=2}
/*
Theme Name: My Block Theme
Theme URI: https://example.com
Author: Jeremy Anderson
Description: Custom FSE theme with GitHub-based updates.
Version: 1.0.0
Requires at least: 6.6
Tested up to: 6.8
Requires PHP: 8.0
Text Domain: my-block-theme
Update URI: https://github.com/yourname/my-block-theme
*/
Step 2: Add a custom updater to functions.php
Because the hostname in the Update URI above is github.com, WordPress will use the update_themes_github.com filter. That filter can return the update data WordPress needs, including the theme slug, version, details URL, and ZIP package URL. The core hook documentation lists the supported fields, including id, theme, version, url, package, and related metadata. :contentReference[oaicite:3]{index=3}
<?php
if ( ! defined( 'ABSPATH' ) ) {
	exit;
}

/**
 * Optional: define this in wp-config.php for private repos.
 *
 * define( 'MY_THEME_GITHUB_TOKEN', 'ghp_xxx' );
 */

add_filter( 'update_themes_github.com', 'my_block_theme_github_updater', 10, 4 );

/**
 * Provide update metadata for this theme from the latest GitHub release.
 *
 * @param false|array $update           Existing update data. Default false.
 * @param array       $theme_data       Theme headers from WordPress.
 * @param string      $theme_stylesheet Theme stylesheet directory name.
 * @param string[]    $locales          Installed locales.
 * @return false|array
 */
function my_block_theme_github_updater( $update, $theme_data, $theme_stylesheet, $locales ) {
	$owner = 'yourname';
	$repo  = 'my-block-theme';

	// Only handle this specific theme.
	if ( 'my-block-theme' !== $theme_stylesheet ) {
		return $update;
	}

	$current_version = isset( $theme_data['Version'] ) ? (string) $theme_data['Version'] : '0.0.0';
	$cache_key       = 'my_block_theme_github_release';
	$cached          = get_site_transient( $cache_key );

	if ( is_array( $cached ) && ! empty( $cached['version'] ) ) {
		$release = $cached;
	} else {
		$api_url = sprintf(
			'https://api.github.com/repos/%s/%s/releases/latest',
			rawurlencode( $owner ),
			rawurlencode( $repo )
		);

		$headers = array(
			'Accept'               => 'application/vnd.github+json',
			'X-GitHub-Api-Version' => '2022-11-28',
			'User-Agent'           => home_url( '/' ),
		);

		if ( defined( 'MY_THEME_GITHUB_TOKEN' ) && MY_THEME_GITHUB_TOKEN ) {
			$headers['Authorization'] = 'Bearer ' . MY_THEME_GITHUB_TOKEN;
		}

		$response = wp_remote_get(
			$api_url,
			array(
				'timeout' => 15,
				'headers' => $headers,
			)
		);

		if ( is_wp_error( $response ) ) {
			return false;
		}

		$code = wp_remote_retrieve_response_code( $response );
		$body = wp_remote_retrieve_body( $response );

		if ( 200 !== $code || empty( $body ) ) {
			return false;
		}

		$data = json_decode( $body, true );

		if ( ! is_array( $data ) || empty( $data['tag_name'] ) ) {
			return false;
		}

		// Convert tags like v1.2.3 to 1.2.3.
		$latest_version = ltrim( (string) $data['tag_name'], 'vV' );

		// Prefer a ZIP asset attached to the release.
		$package_url = '';
		if ( ! empty( $data['assets'] ) && is_array( $data['assets'] ) ) {
			foreach ( $data['assets'] as $asset ) {
				if (
					! empty( $asset['name'] ) &&
					! empty( $asset['browser_download_url'] ) &&
					preg_match( '/\.zip$/i', $asset['name'] )
				) {
					$package_url = $asset['browser_download_url'];
					break;
				}
			}
		}

		// Fallback to GitHub's auto-generated zipball URL.
		if ( empty( $package_url ) && ! empty( $data['zipball_url'] ) ) {
			$package_url = $data['zipball_url'];
		}

		$release = array(
			'version'      => $latest_version,
			'details_url'  => ! empty( $data['html_url'] ) ? $data['html_url'] : '',
			'package_url'  => $package_url,
			'requires_php' => '8.0',
			'tested'       => '6.8',
		);

		// Cache for 6 hours to avoid repeated API requests.
		set_site_transient( $cache_key, $release, 6 * HOUR_IN_SECONDS );
	}

	if ( empty( $release['version'] ) ) {
		return false;
	}

	if ( version_compare( $release['version'], $current_version, '<=' ) ) {
		return false;
	}

	if ( empty( $release['package_url'] ) ) {
		return false;
	}

	return array(
		'id'           => 'https://github.com/yourname/my-block-theme',
		'theme'        => $theme_stylesheet,
		'version'      => $release['version'],
		'new_version'  => $release['version'],
		'url'          => $release['details_url'],
		'package'      => $release['package_url'],
		'tested'       => $release['tested'],
		'requires_php' => $release['requires_php'],
		'autoupdate'   => false,
	);
}
Step 3: Publish a GitHub release with a ZIP asset
This updater works best when each GitHub release includes a packaged ZIP file for the built theme. GitHub’s release endpoints expose attached assets and their browser_download_url, which is exactly what the updater uses as the package value for WordPress. Published release information is publicly available for public repositories. :contentReference[oaicite:4]{index=4}
my-block-theme-1.0.1.zipThat ZIP should contain the actual theme root folder and production-ready files, for example:
my-block-theme/
  style.css
  theme.json
  functions.php
  templates/
  parts/
  assets/
  blocks/
Attaching your own packaged ZIP is usually better than relying only on GitHub’s automatic source archives, because your packaged ZIP gives you a stable top-level folder structure for installation and updates.
Step 4: Tag and release the version
GitHub releases are built on top of tags, so your release tag should match the version in style.css, usually with or without a leading v. :contentReference[oaicite:5]{index=5}
git add .
git commit -m "Release 1.0.1"
git tag v1.0.1
git push origin main
git push origin v1.0.1
Then create the GitHub release for that tag and upload the ZIP asset.
Step 5: Private repo support
Public release metadata can be fetched without authentication, but private repositories need a token with the right repository access. GitHub’s REST release docs cover authentication behavior and release visibility. :contentReference[oaicite:6]{index=6}
define( 'MY_THEME_GITHUB_TOKEN', 'ghp_your_token_here' );Put that in wp-config.php instead of hardcoding secrets into the theme.
Step 6: Force a manual update check while testing
While testing, it helps to clear both the cached release data and WordPress’s theme update transient so the admin checks again immediately.
add_action( 'admin_init', function () {
	if ( current_user_can( 'update_themes' ) && isset( $_GET['force_my_theme_update_check'] ) ) {
		delete_site_transient( 'update_themes' );
		delete_site_transient( 'my_block_theme_github_release' );
		wp_update_themes();
	}
} );
Then visit this URL while logged in:
/wp-admin/themes.php?force_my_theme_update_check=1Why this matters for agencies and long-term maintenance
If you manage multiple WordPress sites, GitHub-based theme updates let you standardize deployments across environments. Instead of manually uploading ZIP files for every client site, you can version releases, track changes, and roll out updates through a predictable pipeline.
- Centralized version control
- Safer deployments
- Repeatable update workflows
- Cleaner rollback paths
- Less admin-side guesswork
Final Takeaway
Classic WordPress theme development gave us control over templates. Modern WordPress development is increasingly about control over systems: layout systems, content systems, design systems, build systems, and release systems.
That is the real difference between the old way and the modern way. It is not just PHP vs blocks. It is isolated templates vs structured workflows.
- Classic themes control templates.
- FSE themes control layouts more cleanly.
- Custom blocks control content structure.
- Node tooling controls asset compilation.
- Git and GitHub releases control versioning and distribution.
If you are coding custom WordPress themes in 2026, the strongest long-term approach is usually not just “build a theme.” It is to build a system that editors can use, developers can maintain, and future releases can support without chaos.
FAQ
Is Full Site Editing the future of WordPress?
It is clearly a major part of modern WordPress theme development. Classic themes still exist, but block-based knowledge is increasingly important for new builds.
Do I still need PHP in a block theme?
Usually yes, but often much less than in a classic theme. Layout concerns move into block templates and theme.json, while PHP remains useful for setup, helpers, and block registration.
Should I commit build files to Git?
For many WordPress projects, yes. If production does not run Node, the compiled files need to be available in the repository or release package.
Can GitHub releases automatically power WordPress theme updates?
Yes, but not by magic. You need the Update URI header and a custom update filter that returns release metadata to WordPress. :contentReference[oaicite:7]{index=7}
What is the biggest practical advantage of custom blocks?
They let you define reusable content structures that editors can use consistently and developers can maintain more easily over time.