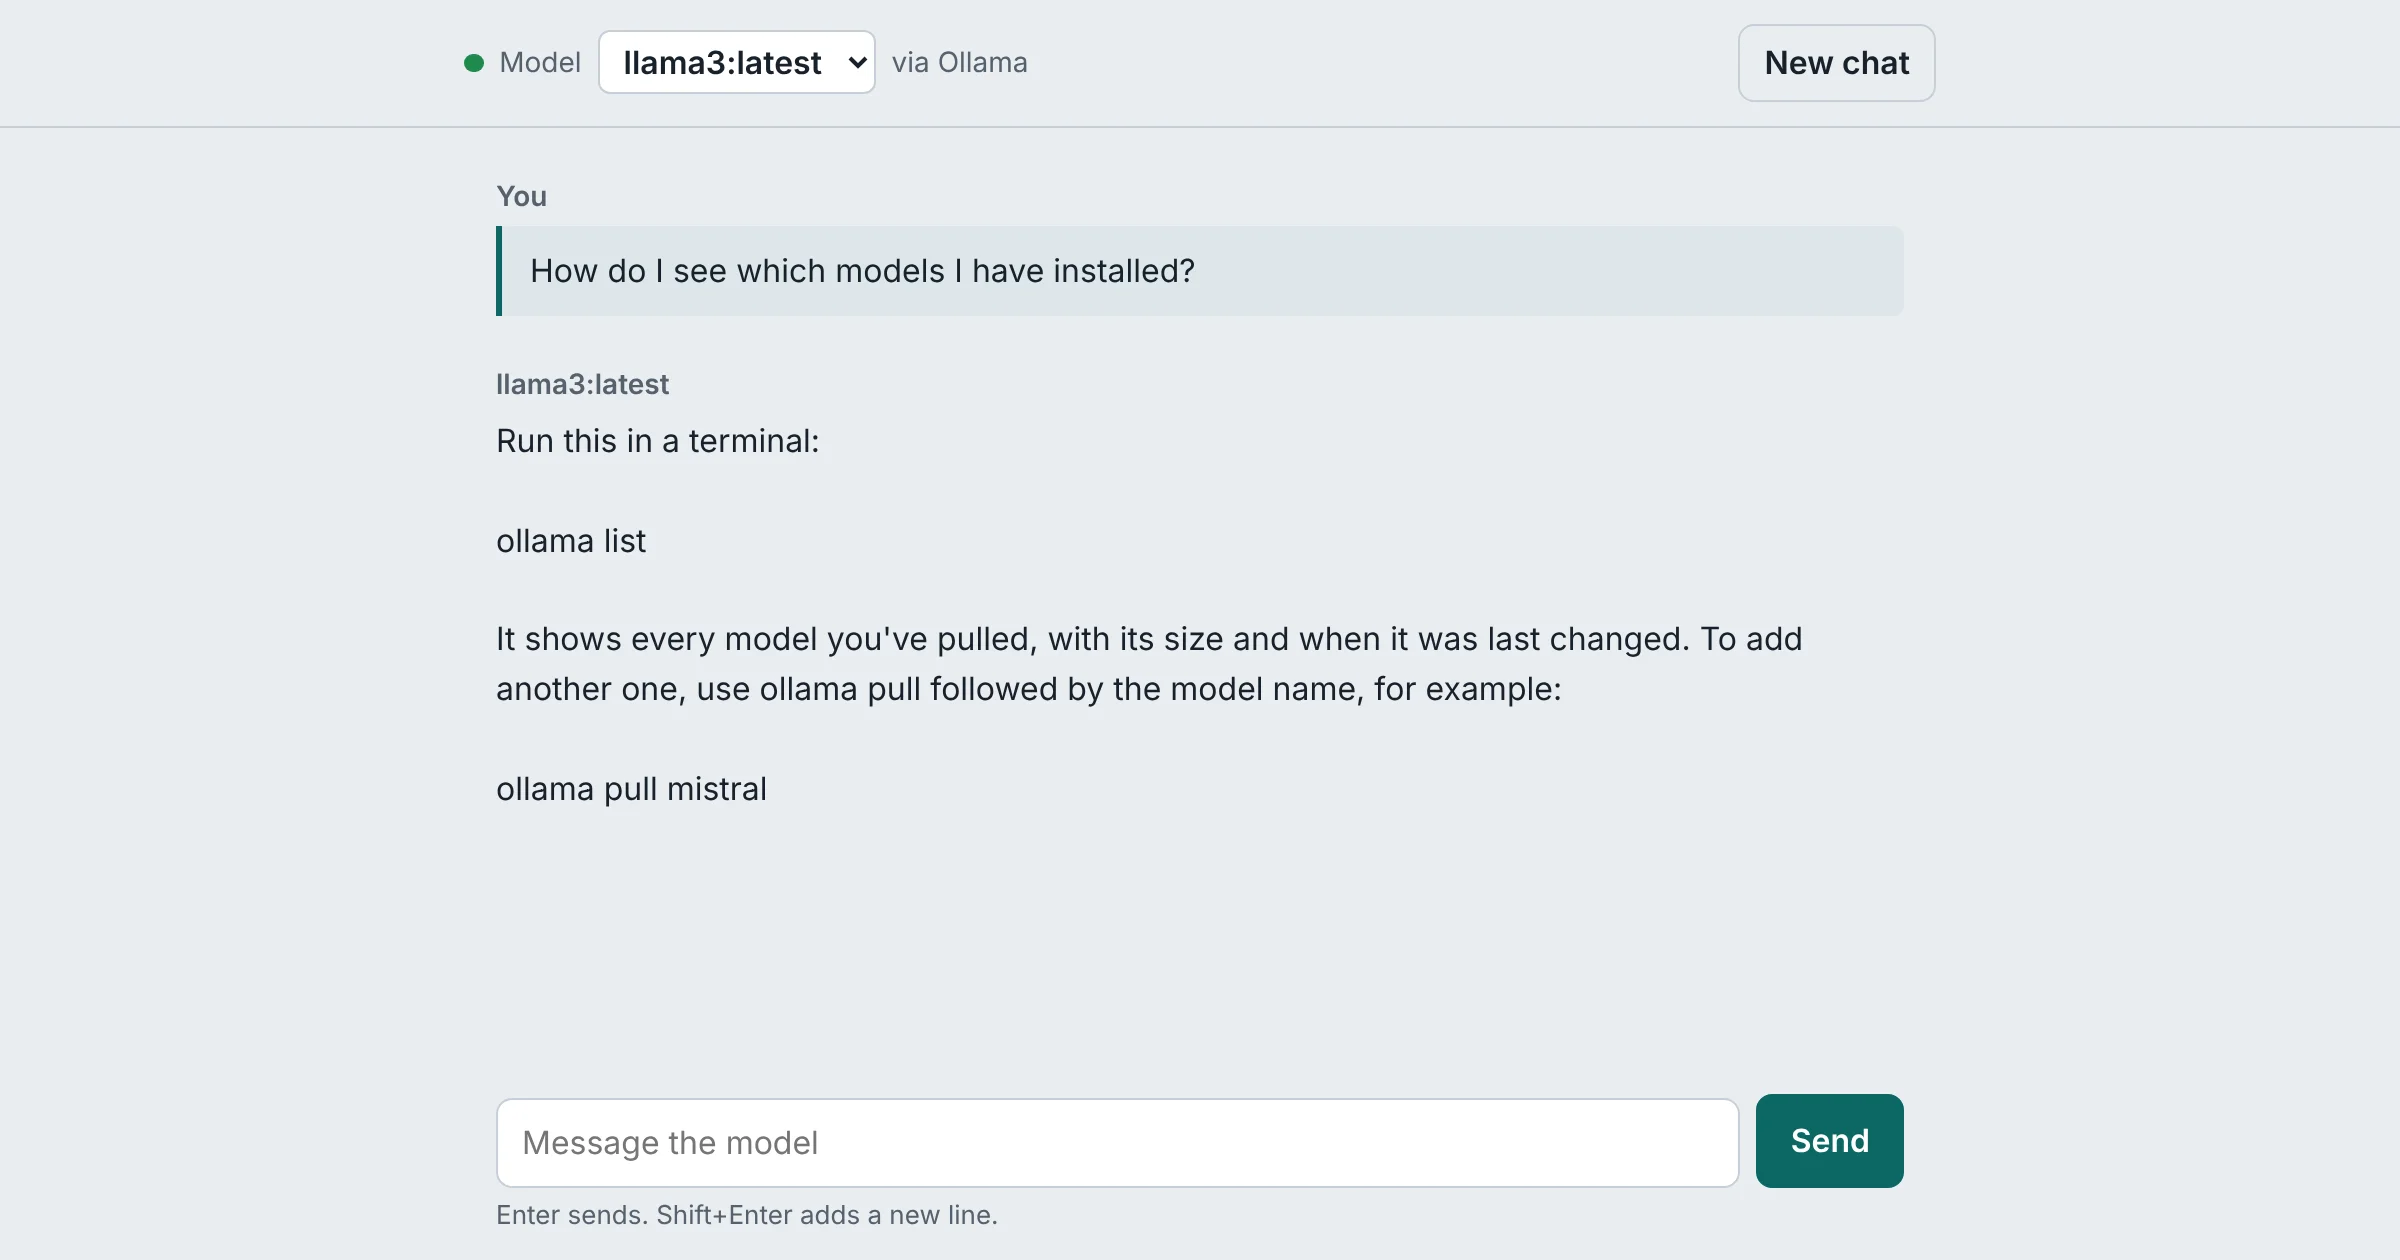
You can build your own AI chat app with Ollama and Flask in about 130 lines of Python: Ollama runs the language model on your own computer, a small Flask server streams its answers, and a plain HTML page lets you chat with it. Nothing leaves your machine unless you choose to share it, and you can later put it online with a Cloudflare Tunnel or move it to a cloud server with Docker.
This is the updated version of my Ollama and Flask guide, first published in 2025, now with streaming answers, conversation memory and a model picker. The code is free and open source on GitHub: CptNope/Ollama-Flask-Web-App.
Why run an AI model locally?
- Your data stays with you. Prompts and answers never go to a third-party API.
- No per-request costs. Once a model is downloaded, using it is free.
- Fast to experiment with. Change a prompt, the model or the code and see the result straight away.
- Easy to connect to your own things, such as sensors, databases or internal documents.
It’s a good fit for developers, researchers, teachers and tinkerers who want to understand how an AI app fits together before paying for anything.
What you’ll build
- Ollama runs the language model (for example Llama 3 or Mistral) on
http://localhost:11434. - A Flask app serves the chat page and two small endpoints: one lists your installed models, the other streams the model’s answer.
- A chat page in plain HTML, CSS and JavaScript: answers appear as they’re written, the model remembers the conversation, and there are Stop and New chat buttons. It has light and dark themes and works offline.
- Cloudflare Tunnel (optional) gives it an HTTPS link without opening ports on your router.
- Docker (optional) packages it with Gunicorn, a production web server, for a cloud server.
Step 1: Install Ollama and download a model
Install Ollama from ollama.com, then download a model:
ollama pull llama3Ollama runs in the background and listens on http://localhost:11434. Pull as many models as you like; the app lists all of them.
Step 2: Get the code and install Flask
git clone https://github.com/CptNope/Ollama-Flask-Web-App
cd Ollama-Flask-Web-App
python -m venv venv
source venv/bin/activate   # Windows: venv\Scripts\activate
pip install -r requirements.txt
Step 3: How the Flask back end streams answers
The back end is one file, app.py. The chat endpoint first checks the request: it only accepts your messages and the model’s replies, caps a conversation at 20,000 characters and checks the model name. Then it sends the whole conversation to Ollama’s chat API and passes the answer on to the browser piece by piece as Ollama writes it:
try:
    upstream = requests.post(
        f"{OLLAMA_URL}/api/chat",
        json={"model": model, "messages": messages, "stream": True},
        stream=True,
        timeout=(5, 300),
    )
except requests.RequestException:
    return jsonify({"error": "Can't reach Ollama. Start it with `ollama serve`."}), 502

if upstream.status_code != 200:
    try:
        detail = upstream.json().get("error", "")
    except ValueError:
        detail = ""
    upstream.close()
    if upstream.status_code == 404:
        detail = f"Model {model} isn't installed. Run `ollama pull {model}`."
    return jsonify({"error": detail or "Ollama returned an error."}), 502

def generate():
    try:
        for line in upstream.iter_lines():
            if not line:
                continue
            chunk = json.loads(line)
            if chunk.get("error"):
                yield f"\n\n[Ollama error: {chunk['error']}]"
                return
            yield chunk.get("message", {}).get("content", "")
            if chunk.get("done"):
                return
    except (requests.RequestException, ValueError):
        yield "\n\n[The connection to Ollama was lost.]"
    finally:
        upstream.close()

return Response(
    stream_with_context(generate()),
    mimetype="text/plain; charset=utf-8",
    headers={"Cache-Control": "no-cache", "X-Accel-Buffering": "no"},
)
A few details make this robust:
"stream": Trueon both sides. Ollama sends one line of JSON per piece of the answer; Flask reads each line and forwards just the text, so the browser can show it straight away.- Clear errors instead of crashes. If Ollama isn’t running, the page says to start it; if a model isn’t installed, it shows the exact
ollama pullcommand. - A second endpoint,
/api/models, asks Ollama which models you have, so the page can offer them in a menu. - Debug mode is off unless you ask for it with
FLASK_DEBUG=1. The section on sharing explains why that matters.
Step 4: How the chat page shows the answer as it streams
The page keeps the conversation in memory and sends all of it with each new message, which is how the model remembers what you said earlier. To show the answer as it arrives, static/script.js reads the response a chunk at a time:
const res = await fetch("/api/chat", {
  method: "POST",
  headers: { "Content-Type": "application/json" },
  body: JSON.stringify({ model: model.value, messages: history }),
  signal: controller.signal,
});
if (!res.ok) {
  const data = await res.json().catch(() => ({}));
  throw new Error(data.error || "The request failed.");
}
const reader = res.body.getReader();
const decoder = new TextDecoder();
for (;;) {
  const { value, done } = await reader.read();
  if (done) break;
  answer += decoder.decode(value, { stream: true });
  body.textContent = answer;
  turn.scrollIntoView({ block: "end" });
}
Everything the model writes is set with textContent, never as HTML, so a reply can’t inject code into the page. The Stop button cancels the request with an AbortController.
Step 5: Run it
python app.pyOpen http://localhost:5000, choose a model and ask a question. Press Enter to send, or Shift+Enter for a new line.
Settings
Everything is set with environment variables, so you don’t need to edit the code:
| Variable | Default | What it does |
|---|---|---|
OLLAMA_URL | http://localhost:11434 | Where Ollama is running |
OLLAMA_MODEL | llama3 | Model selected when the page opens |
SYSTEM_PROMPT | none | Instructions added to every conversation |
HOST and PORT | 127.0.0.1 and 5000 | Address for python app.py |
FLASK_DEBUG | off | Set to 1 for Flask’s debugger, never on a public address |
For example, OLLAMA_MODEL=mistral SYSTEM_PROMPT="Answer briefly." python app.py starts with Mistral and asks for short answers.
Share it online with Cloudflare Tunnel
A Cloudflare Tunnel gives your local app an HTTPS address without opening any ports on your router. For a quick test you don’t even need a Cloudflare account:
cloudflared tunnel --url http://localhost:5000Cloudflare prints a temporary trycloudflare.com link that anyone can open. Before you share it, check three things:
- Debug mode must be off. Flask’s debugger lets anyone who can open the page run Python code on your computer. The code above keeps it off unless you set
FLASK_DEBUG=1; never do that while a tunnel is running. - Anyone with the link can use your model, and your computer does the work. For anything longer than a quick demo, create a named tunnel on your own domain and put Cloudflare Access in front of it, so only people you allow can sign in.
- Quick tunnels are for testing. Cloudflare says they have no uptime guarantee and a new address each time.
Move it to the cloud with Docker
The repo includes a Dockerfile that runs the app with Gunicorn as a regular (non-root) user, so the same app runs on any cloud server (AWS, DigitalOcean, Linode and so on):
- Install Ollama on the server and pull your model. Larger models need a server with a GPU.
- Clone the repo and build the image.
- Run the container. It reaches Ollama on the host machine at
host.docker.internal. - Put a reverse proxy such as Caddy or Nginx in front for HTTPS, and add a login (Cloudflare Access or your proxy’s authentication) before it’s public.
docker build -t ollama-flask-app .
docker run -d -p 5000:5000 \
  --add-host=host.docker.internal:host-gateway \
  -e OLLAMA_MODEL=llama3 \
  ollama-flask-app
Inside a container, localhost means the container itself, not your server. That’s why the image points the app at host.docker.internal, and the --add-host flag makes that name work on Linux.
Ideas for what to build next
- Your own documents: connect a vector database for retrieval-augmented generation (RAG), the approach behind my RAG AI Specialist.
- Voice in and out with Whisper for speech-to-text and a text-to-speech engine like Piper.
- Image generation with Stable Diffusion alongside Ollama.
- Saved chats and user accounts, or a progressive web app you can install on a phone.
FAQ
Is Ollama free?
Yes. Ollama is free to download and use, and many open models, such as Llama 3 and Mistral, are free to run on your own hardware. Check each model’s license before using it commercially.
Do I need a GPU?
No, smaller models run on a regular computer’s CPU, just more slowly. A GPU makes larger models practical.
Why does my Flask app say it can’t read the response from Ollama?
Usually because Ollama streamed its answer, as it does by default, in many lines of JSON. Either send "stream": false to get one JSON object, or read the stream line by line, as this app does.
Is it safe to put my local AI app online?
It can be, if debug mode is off and access is restricted. Use a Cloudflare Tunnel so you don’t open ports, put Cloudflare Access or another login in front of it, and never run Flask’s debugger on a public address.
Where is the source code?
On GitHub at CptNope/Ollama-Flask-Web-App, under the MIT license.
Want a private AI tool built for your business? See AI systems and consulting, or book a free 30-minute call.
Related reading: Building Practical AI Tools for Real Businesses · RAG AI Specialist: an AI-Powered NIST 800-171 Audit Companion · Building a Real-Time AI-Powered Mario Dashboard
